Fluke PTi120 Pocket Thermal Imager - Convenient and Durable Infrared Camera
Published on Aug. 2, 2023, 1:50 p.m.
The Importance of Thermal Imaging Technology
Thermal imaging technology is a non-contact method of temperature measurement that captures the infrared radiation emitted by different objects to generate images. This technology finds wide applications in industries, construction, healthcare, and more. In modern work environments, rapid and precise detection of temperature variations in equipment is crucial. Therefore, portable thermal imagers have become indispensable tools in modern maintenance and inspection work.
The Fluke PTi120 Pocket Thermal Imager is a compact and rugged infrared camera designed for inspections and troubleshooting in industrial environments. Its portability, intuitive interface, and robust build make it well-suited for electrical and mechanical technicians who need an infrared camera that can withstand worksite conditions. This review takes an in-depth look at the key features and performance of the PTi120.

Overview
The PTi120 features a 120x90 resolution infrared sensor that can detect temperatures from -20°C to 150°C. Its 3.5” touchscreen display shows infrared images blended with visual light images for easy identification of temperature anomalies or hot spots. The durable IP54-rated enclosure provides protection from dust and splashing water. At just 5” x 3.5”, the PTi120 fits easily in a pocket or tool bag.

Key Features
- Compact size fits in pocket
- Rugged and durable construction
- Intuitive touchscreen interface
- IR Fusion blending of infrared and visible light images
- Temperature range from -20°C to 150°C
- Radiometric images with temperature data
Design and Build Quality
Despite its small size, the PTi120 has a solid feel typical of Fluke meters and test equipment. The outer housing is made of impact-resistant plastic that can withstand 1 meter drops. Large buttons on the back and side are easy to press, even when wearing gloves. The wrist lanyard and hard case allow for secure handling in industrial environments. Overall, the PTi120 is built to hold up to the rough use of professional technicians.
Image Quality and Features
With 10,800 infrared pixels, the PTi120 produces decent image quality for a pocket camera. The touchscreen IR Fusion feature lets users blend infrared and visible light images to precisely identify temperature issues. Images and data can be conveniently transferred via the micro USB port and Fluke Connect software. Useful features like adjustable palettes, emissivity adjustments, and temperature alarms help technicians analyze and document thermal patterns.
Ease of Use and Connectivity
The ease of use of a thermal imager is one of the key factors in assessing its practicality. Well-designed user interfaces and operational convenience can enhance work efficiency. Additionally, the connectivity of a thermal imager is crucial, as it determines whether the device can exchange data or be controlled by other systems. Therefore, an excellent thermal imager should have good connectivity, supporting various communication protocols and data transfer methods.

Applications
The compact PTi120 is ideal for electrical contractors, HVAC technicians, and maintenance teams. It allows quick scans of electrical panels, motors, pumps, and ductwork to identify hot spots or anomalies. The IR fusion and radiometric images support thorough inspections and reporting. With its ruggedness and portability, field technicians can carry it everywhere for temperature checks and early detection of developing problems.
User Feedback
The PTi120 has received positive feedback for its convenient size, useful features, and rugged durability. Users like the image blending capabilities and intuitive touchscreen controls. Many technicians mention that it withstands accidental drops and fits nicely in a pouch or pocket. Complaints focus mainly on the lower resolution sensor compared to more expensive models. Overall, most users agree that it provides good value for a durable, feature-packed infrared camera.
Pros
- Compact and lightweight
- Rugged housing withstands 1 meter drops
- Easy-to-use touchscreen interface
- IR Fusion for precisely blended images
- Fluke quality and durability
Cons
- Lower resolution IR sensor than pricier models
- Lacks fine temperature measurement of expensive thermal imagers
- Short 1.5 hour battery life per charge
Conclusion
The Fluke PTi120 packs capable infrared imaging into a conveniently small camera. Its intuitive operation, image blending, and durable construction make it suitable for technicians who need an easy-to-use infrared camera that can withstand worksite conditions. While more expensive than comparable entry-level models, the PTi120 reflects Fluke’s reputation for quality and reliability. Overall, it’s a good choice for those seeking an infrared camera that’s built to last.
Future Outlook
With continuous advancements in science and technology, thermal imaging technology will have broader development prospects in the future. We can expect breakthroughs in resolution, sensitivity, connectivity, and application fields of thermal imaging technology. As the demand for safety and efficiency continues to rise, thermal imaging technology will play a more significant role in industries, healthcare, security, and other fields. Therefore, investing in and researching thermal imaging technology holds long-term strategic significance.
Specifications
- IR resolution: 120 x 90 pixels
- Thermal sensitivity: ≤0.10°C at 30°C target temp
- Temperature range: −20°C to 150°C
- Focus system: Fixed focus, from 0.45 m (1.5 ft)

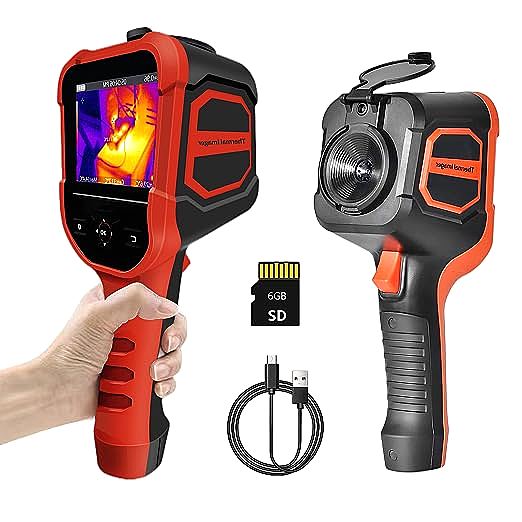
In the Box
- PTi120 imager
- Lithium ion rechargeable battery (installed)
- AC power supply/battery charger
- Micro USB cable
- Soft transport case
- Adjustable hand strap
- Quick start guide
- Calibration certificate
Using the PTi120
- Charge battery fully before first use
- Turn on imager using power button
- Adjust emissivity as needed for target surface
- Point imager at target and scan area
- Freeze image to inspect hot spots or anomalies
- Tap buttons to adjust blending and other settings
- Transfer images/data by plugging into computer’s USB port